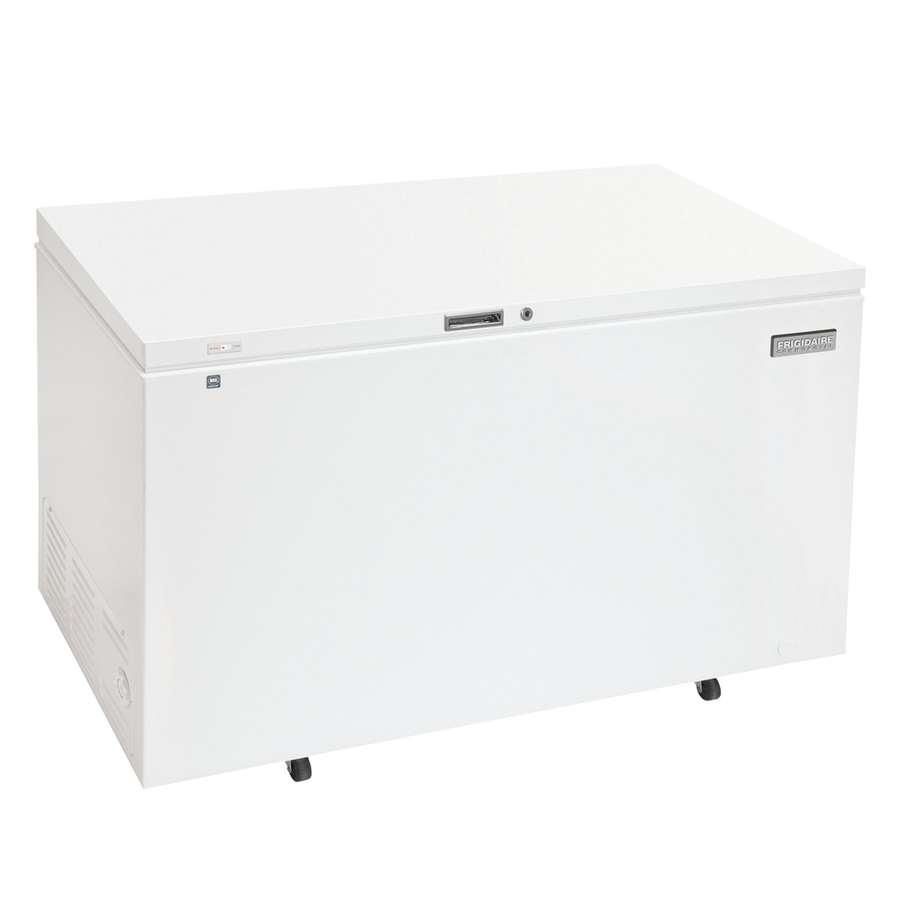
Nope, that is definitely not a picture of what my deep freezer look like right now. I'm relatively new to the deep freezer system, and I would certainly say I need to improve on utilizing it more effectively. Recently, my husband made a comment to me, "Wow, our deep freezer is full. We could be feasting." (Side Note: That's not really a direct quote but how I remember it.) What he was saying was actually a nice way to put it. In fact, I can barely put anything else inside my deep freezer and moving the nicely organized shelves back and forth is impossible.
This is a good problem to have really. Since I have been spending each season preserving my favorite fruits and veggies, my freezer has been storing delicious food waiting to be used in a meal. I've also occasionally saved some larger meals and stuck them in one of the overflowing racks. Additionally, I have joined a meat CSA where I receive a random cut of meat for future use. Those have nonchalantly been tossed in there but not been used.
I'm willing to bet that I could eat for at least 3 weeks solid just from my deep freezer. Cha-ching goes my brain as I look at my dwindling food budget as we prepare for another holiday feast at my house. My husband's comment has sprung me into action (rather than put up my defenses!), and I am on a mission to wisely but regularly pull more from my deep freezer-meats, fish, chicken stock, pumpkin puree, green peppers, chopped tomatoes, corn, blueberries, and much more! Once a week, I want to plan a meal centered around what's in my deep freezer or actually use one of those meals I have been saving for "convenience". Who needs to order a last minute pizza when I have a delicious and nourishing frozen soup with homemade bread calling my name in that freezer.
What's in your deep freezer and do you have a system of regularly using what's in there?
Ready to feast frugally,
Jen Starks, Owner
www.ecologicalbabies.com
ecologicalbabies@gmail.com
574.275.1235
Showing posts with label Saving Money. Show all posts
Thursday, December 13, 2012
Friday, November 23, 2012
Save Your Turkey Bones-Homemade Turkey Soup!
If you hosted Thanksgiving this year or visited a home that doesn't use their turkey bones, you have just received an extra bonus of lots of turkey soup or stock to keep your family warm throughout the cold seasons. Are you ready for a super easy, extremely delicious, and nourishing post-thanksgiving meal?
This soup has been traditionally prepared in my family since I was a child, except now I use a little better ingredients. As you will see, the ingredients and quantities are flexible, as you cannot go wrong! If you don't have time or energy to make this the day right after Thanksgiving, you can simply freeze the bones and wait until you are ready. So easy!
Ingredients:
Turkey bones
1 onion quartered (or leftover frozen scraps of veggies)
water (enough to fill your largest pot)
1 Tbs of vinegar (I use ACV)-optional
Leftover uncooked veggies (or frozen veggies)-use whatever you'd like to have in your soup
noodles or rice (adjust to amount to your liking or can be omitted)
sea salt
Directions:
After I have stripped my Thanksgiving turkey of all the meat I can pull off, I put the turkey in the largest pot I have (or half of the turkey this year, since the bird was so big). Next, I pull out my frozen scraps of veggies that I add to progressively with different meals (onion peels, carrot ends, mushroom bottoms, celery ends). Sometimes I throw in some fresh herbs I have leftover in the fridge as well (parsley, oregano, rosemary, etc). I fill the pot up about 75% to the top and bring it all to a boil. Finally, I add a little vinegar which pulls out more nutrients from the bones of the turkey. Once boiling, I turn it to a low simmer and cook for as many hours as I want (minimum of 4 hours). This time, I did this the night before and let it simmer all night long and into the morning.
Once you are done making stock, you strain all the bones and veggies out of the pot. I put a mesh sieve directly into the pot and then put the remains in another bowl to use again for stock. Once the stock is all cleared out, add any leftover veggies or frozen veggies you want. This year, I added big chunks of carrots, corn and peas (nothing fancy). I boiled it again until the carrots were softened. Next, add either your noodles or rice into the pot. Once cooked, throw in some leftover turkey (I use the dryer pieces of meat) and add salt to your taste. Voila!
Later, you can reboil those bones over and over again using the same technique. After your stock is made, you can freeze the stock in muffin tins and put them in a freezer bag for later recipes. Stock can be expensive in the stores and this way, you know exactly how healthy it is!
I also like to make this for any family that is still staying with us. This way, I don't have to worry about spending more money on a meal and it feeds a ton of people. Depending on how big your pot is, ours would feed about 12 or more people.
Here's to good health,
Jen Starks, Owner
www.ecologicalbabies.com
ecologicalbabies@gmail.com
574.275.1235
This soup has been traditionally prepared in my family since I was a child, except now I use a little better ingredients. As you will see, the ingredients and quantities are flexible, as you cannot go wrong! If you don't have time or energy to make this the day right after Thanksgiving, you can simply freeze the bones and wait until you are ready. So easy!
Homemade Turkey Soup
Ingredients:
Turkey bones
1 onion quartered (or leftover frozen scraps of veggies)
water (enough to fill your largest pot)
1 Tbs of vinegar (I use ACV)-optional
Leftover uncooked veggies (or frozen veggies)-use whatever you'd like to have in your soup
noodles or rice (adjust to amount to your liking or can be omitted)
sea salt
Directions:
After I have stripped my Thanksgiving turkey of all the meat I can pull off, I put the turkey in the largest pot I have (or half of the turkey this year, since the bird was so big). Next, I pull out my frozen scraps of veggies that I add to progressively with different meals (onion peels, carrot ends, mushroom bottoms, celery ends). Sometimes I throw in some fresh herbs I have leftover in the fridge as well (parsley, oregano, rosemary, etc). I fill the pot up about 75% to the top and bring it all to a boil. Finally, I add a little vinegar which pulls out more nutrients from the bones of the turkey. Once boiling, I turn it to a low simmer and cook for as many hours as I want (minimum of 4 hours). This time, I did this the night before and let it simmer all night long and into the morning.
Once you are done making stock, you strain all the bones and veggies out of the pot. I put a mesh sieve directly into the pot and then put the remains in another bowl to use again for stock. Once the stock is all cleared out, add any leftover veggies or frozen veggies you want. This year, I added big chunks of carrots, corn and peas (nothing fancy). I boiled it again until the carrots were softened. Next, add either your noodles or rice into the pot. Once cooked, throw in some leftover turkey (I use the dryer pieces of meat) and add salt to your taste. Voila!
Later, you can reboil those bones over and over again using the same technique. After your stock is made, you can freeze the stock in muffin tins and put them in a freezer bag for later recipes. Stock can be expensive in the stores and this way, you know exactly how healthy it is!
I also like to make this for any family that is still staying with us. This way, I don't have to worry about spending more money on a meal and it feeds a ton of people. Depending on how big your pot is, ours would feed about 12 or more people.
Here's to good health,
Jen Starks, Owner
www.ecologicalbabies.com
ecologicalbabies@gmail.com
574.275.1235
Labels:
Food,
Saving Money,
Thanksgiving
Monday, November 19, 2012
Black Friday & Lessons in Simplicity
This post is particularly geared for those of you who are attempting to live a more simple life. It's often challenging to work on a simple life around the holidays, while the rest of the world goes into a spending frenzy.
Ahh, the madness of Black Friday/Cyber Monday!!! I must admit, last year I participated in Black Friday. In previous years, I had avoided it like the plague, imagining elbows being thrown over some great "deal" and the air permeating greedy and desperation. In an effort to avoid some of this, I shopped later in the morning and fortunately I don't pay attention to what's "hot" for the year. My plan was to first make a list, then look at the sales online, then pick a couple stores I thought would have some items on my list on sale.
Honestly, the best part was that my husband was happy to watch the kids for half of the day while I was able to shop in peace...alone. In addition, I enjoyed coming home to report that I had purchased many items off my list. My favorite "score" was my daughter's ice skates that she "had to have" at something like 30% off.
This year, I won't be participating and I'm not sure I will again. I'm absolutely not judging anyone who is going out this year. I actually feel like some of my stereotypes about shoppers that day and all the hype has dissipated a bit, and now don't feel like I'm really missing out on anything. Good luck!
I am, however, intentionally avoiding these days to shop. I find two primary pitfalls of this whole "Black Friday/Cyber Monday" events. First of all, I think we are often tempted to buy things just because they are such a good deal. I'm familiar with that initial feeling of that deal. But do we really NEED this product? By purchasing something you wouldn't have normally purchased, even if it is a good deal, you might end up spending more money overall. In addition, you have gained more possessions to clutter your home. From a simplicity standpoint, making impulse purchases like these cloud our spiritual well-being. Instead, we should be looking to purchase items intentionally for their usefulness or beauty in mind. If you think back to impulse purchases you've made in the past, have you honestly used these items regularly? Have any of these items been gathering dust in your cabinets, basements, or been sold off cheap in a yard sale? Maybe some have been winners, some not. How many broke after being used only a few times? My point is to try to encourage you to think ahead of what you really need and steer away from those impulse items.
My second issue is about how this "holiday" tends to corrupt our culture overall. Do you think that supporting these box stores like Walmart who have these rock bottom prices, mandating that their employees come in on Thanksgiving, are really contributing to the better good? When you are choosing to support businesses like this on these holidays, in encourages them to continue to do this. In fact, next year they want to make more profit and will come up with a strategy to do so. In the meantime, the small businesses who choose to stay home and be with family, who absolutely can't compete with those prices, and who value fair wages are the big losers.
What happens when we choose the box stores? The Walmarts stick around (or abandon cities when they aren't making enough profit), and the small businesses close up shop. Then those business owners whom you love to visit and know who you by your name (and love your precious little baby you are holding while shopping) will be something you remember that used to be around. "Oh I loved that store." "Oh the owner, Mary, was so sweet and friendly." Can you think of some small businesses or boutiques you used to enjoy going inside?
Here's a scenario: The box store's bakery is probably a couple dollars cheaper, tastes pretty good, and is open 24 hrs. It's an easy purchase, especially if you are shopping for other items in their store. Let me ask you this- Do you feel different when you walk inside your local bakery shop, breathe in the wonderful smells, and actually see the owner of that business greeting you with a smile on their face? I know I do. I sometimes walk out feeling a million dollars when I know I am supporting a specific person in my community who has put love into what they are producing and appreciates my business.
Have you also started to notice that the media and these big stores with huge marketing dollars are adding on days for shop in their store? Now we have extended hours in the middle of the night and you now can come on Thursday, the actual day we have traditionally stayed home to give thanks with our family. Those family members and friends of yours who work in retail might not be joining your family dinner soon, and might not be able to just relax and spend time with family. What's next? Is this going to become a week long event? I've had a hard enough time going into stores with Christmas music playing and all the fall decorations taken down. I was even in a store the day after Halloween and they were pushing Christmas already. Sheesh!
Final thoughts on simplicity and the upcoming holiday (I know this has been lengthy!). Please consider less "toys" and "stuff" for your kiddos this holiday. If you have fewer, high-quality items and also trying to pick ones that you know your kids will play with over and over again, this will make your holiday experience richer for your kids and you. Your wallet (and budget) won't even know the difference.
Peace,
Jen Starks, Owner
www.ecologicalbabies.com
ecologicalbabies@gmail.com
574.275.1235
Ahh, the madness of Black Friday/Cyber Monday!!! I must admit, last year I participated in Black Friday. In previous years, I had avoided it like the plague, imagining elbows being thrown over some great "deal" and the air permeating greedy and desperation. In an effort to avoid some of this, I shopped later in the morning and fortunately I don't pay attention to what's "hot" for the year. My plan was to first make a list, then look at the sales online, then pick a couple stores I thought would have some items on my list on sale.
Honestly, the best part was that my husband was happy to watch the kids for half of the day while I was able to shop in peace...alone. In addition, I enjoyed coming home to report that I had purchased many items off my list. My favorite "score" was my daughter's ice skates that she "had to have" at something like 30% off.
This year, I won't be participating and I'm not sure I will again. I'm absolutely not judging anyone who is going out this year. I actually feel like some of my stereotypes about shoppers that day and all the hype has dissipated a bit, and now don't feel like I'm really missing out on anything. Good luck!
I am, however, intentionally avoiding these days to shop. I find two primary pitfalls of this whole "Black Friday/Cyber Monday" events. First of all, I think we are often tempted to buy things just because they are such a good deal. I'm familiar with that initial feeling of that deal. But do we really NEED this product? By purchasing something you wouldn't have normally purchased, even if it is a good deal, you might end up spending more money overall. In addition, you have gained more possessions to clutter your home. From a simplicity standpoint, making impulse purchases like these cloud our spiritual well-being. Instead, we should be looking to purchase items intentionally for their usefulness or beauty in mind. If you think back to impulse purchases you've made in the past, have you honestly used these items regularly? Have any of these items been gathering dust in your cabinets, basements, or been sold off cheap in a yard sale? Maybe some have been winners, some not. How many broke after being used only a few times? My point is to try to encourage you to think ahead of what you really need and steer away from those impulse items.
My second issue is about how this "holiday" tends to corrupt our culture overall. Do you think that supporting these box stores like Walmart who have these rock bottom prices, mandating that their employees come in on Thanksgiving, are really contributing to the better good? When you are choosing to support businesses like this on these holidays, in encourages them to continue to do this. In fact, next year they want to make more profit and will come up with a strategy to do so. In the meantime, the small businesses who choose to stay home and be with family, who absolutely can't compete with those prices, and who value fair wages are the big losers.
What happens when we choose the box stores? The Walmarts stick around (or abandon cities when they aren't making enough profit), and the small businesses close up shop. Then those business owners whom you love to visit and know who you by your name (and love your precious little baby you are holding while shopping) will be something you remember that used to be around. "Oh I loved that store." "Oh the owner, Mary, was so sweet and friendly." Can you think of some small businesses or boutiques you used to enjoy going inside?
Here's a scenario: The box store's bakery is probably a couple dollars cheaper, tastes pretty good, and is open 24 hrs. It's an easy purchase, especially if you are shopping for other items in their store. Let me ask you this- Do you feel different when you walk inside your local bakery shop, breathe in the wonderful smells, and actually see the owner of that business greeting you with a smile on their face? I know I do. I sometimes walk out feeling a million dollars when I know I am supporting a specific person in my community who has put love into what they are producing and appreciates my business.
Have you also started to notice that the media and these big stores with huge marketing dollars are adding on days for shop in their store? Now we have extended hours in the middle of the night and you now can come on Thursday, the actual day we have traditionally stayed home to give thanks with our family. Those family members and friends of yours who work in retail might not be joining your family dinner soon, and might not be able to just relax and spend time with family. What's next? Is this going to become a week long event? I've had a hard enough time going into stores with Christmas music playing and all the fall decorations taken down. I was even in a store the day after Halloween and they were pushing Christmas already. Sheesh!
Final thoughts on simplicity and the upcoming holiday (I know this has been lengthy!). Please consider less "toys" and "stuff" for your kiddos this holiday. If you have fewer, high-quality items and also trying to pick ones that you know your kids will play with over and over again, this will make your holiday experience richer for your kids and you. Your wallet (and budget) won't even know the difference.
Peace,
Jen Starks, Owner
www.ecologicalbabies.com
ecologicalbabies@gmail.com
574.275.1235
Labels:
Children,
Community,
Family,
Green Living,
Saving Money,
Simplicity
Tuesday, July 31, 2012
Cloth Diapers- Tax Deductible!
I am thrilled to share that I have recently found out that your cloth diapers (and a diaper service too) can be claimed as a medical expense for reimbursement. In other words, you can pay for them using your flexible spending account or add it as a medical expense deduction. There is only one minor stipulation to qualify for this.
Your doctor needs to write you a prescription for cloth diapers for the "treatment of a disease". What exactly this means isn't clear to me at this point but I hope to touch base with the IRS to find out more information.
You can find this information at the IRS' website and here is a direct link to the publication:
http://www.irs.gov/pub/irs-pdf/p502.pdf
You can find the topic under "What's Eligible" on page 14 titled "Diaper Service." What's more, this document explains the steps you need to take to claim this or be reimbursed.
Sweet, eh? Share this with all your cloth diapering friends!
Cheers,
Jen Starks, Owner
www.ecologicalbabies.com
ecologicalbabies@gmail.com
574.275.1235
Your doctor needs to write you a prescription for cloth diapers for the "treatment of a disease". What exactly this means isn't clear to me at this point but I hope to touch base with the IRS to find out more information.
You can find this information at the IRS' website and here is a direct link to the publication:
http://www.irs.gov/pub/irs-pdf/p502.pdf
You can find the topic under "What's Eligible" on page 14 titled "Diaper Service." What's more, this document explains the steps you need to take to claim this or be reimbursed.
Sweet, eh? Share this with all your cloth diapering friends!
Cheers,
Jen Starks, Owner
www.ecologicalbabies.com
ecologicalbabies@gmail.com
574.275.1235
Labels:
Cloth Diapers,
Saving Money
Monday, July 30, 2012
Top 10 Eco-Friendly Tips to Beat the Heat
Whether you are pregnant, wearing your baby, or just wanting to keep cool during the hot summer months, we hope that some of these suggestions will help you and your entire family beat the heat while also being "green".
1. Drink loads of water. Add mint, lemon, or cucumbers for extra cooling.
2. My go-to solution for most things: Green Smoothies-breakfast, lunch, dinner. Add coconut water! We also freeze our green smoothies and they make delicious popsicles. I have a great recipe posted here.
3. Skip the oven. Use either a crockpot or your grill.
4. Eat more fresh fruit and veggies, especially watermelon.
5. Carry a spray bottle around with you. Better yet, give your kids one too and they can keep themselves cool while having fun! I'm not usually an advocate to go out and purchase a lot of baby accessories but this fan would be a great addition to your stroller or carseat: http://www.leapsandbounds.com/catalog/product.jsp?productId=536614&cmSource=Search
6. Skip the blow dryer. Sure your hair might not be as nice as you want it but who wants to sweat right after showering? And wet hair = cooler body!
7. In the evening when the temperature breaks, blow warm air out of the house. Then cool it down with your A/C.
8. Skip using the drying cycle on your dishwasher. Instead, open up the door and let them air dry. Same with your clothes. Use that clothesline for clothes and your diapers!
9. Wear loose thin clothing made out of natural fibers. Letting sweat evaporate off your skin helps keep you cool. Better yet, wear less clothing (especially at home!). Keep your baby in nothing but their cute cloth diaper!
10. Visit your public pools and local library!
Stay cool,
Jen Starks, Owner
www.ecologicalbabies.com
ecologicalbabies@gmail.com
574.275.1235
Top 10 "Ecological" Ways to Beat the Summer Heat:
1. Drink loads of water. Add mint, lemon, or cucumbers for extra cooling.
2. My go-to solution for most things: Green Smoothies-breakfast, lunch, dinner. Add coconut water! We also freeze our green smoothies and they make delicious popsicles. I have a great recipe posted here.
3. Skip the oven. Use either a crockpot or your grill.
4. Eat more fresh fruit and veggies, especially watermelon.
5. Carry a spray bottle around with you. Better yet, give your kids one too and they can keep themselves cool while having fun! I'm not usually an advocate to go out and purchase a lot of baby accessories but this fan would be a great addition to your stroller or carseat: http://www.leapsandbounds.com/catalog/product.jsp?productId=536614&cmSource=Search
6. Skip the blow dryer. Sure your hair might not be as nice as you want it but who wants to sweat right after showering? And wet hair = cooler body!
7. In the evening when the temperature breaks, blow warm air out of the house. Then cool it down with your A/C.
8. Skip using the drying cycle on your dishwasher. Instead, open up the door and let them air dry. Same with your clothes. Use that clothesline for clothes and your diapers!
9. Wear loose thin clothing made out of natural fibers. Letting sweat evaporate off your skin helps keep you cool. Better yet, wear less clothing (especially at home!). Keep your baby in nothing but their cute cloth diaper!
10. Visit your public pools and local library!
Stay cool,
Jen Starks, Owner
www.ecologicalbabies.com
ecologicalbabies@gmail.com
574.275.1235
Labels:
Green Living,
Saving Money,
Treehugger
Monday, July 23, 2012
How to Make Pickles!
Well, for the first time, I've entered the process of making pickles. I must be upfront that my fermenting process has only begun and therefore cannot vouch for how great these pickles taste...yet. I will come back into this blog when it's time and add how it turned out then.
Added later- These pickles turned out delicious and had the perfect crunch. Once we started eating them, they didn't last long!
Just like all the new things I've tried at home for the first time this year (making detergent, etc), this is another EASY thing to do from home and much healthier for you. The recipe I am sharing came from a local CSA member who has been using this recipe to make pickles. I was excited that she passed this along because we received a ton of pickling cucumbers in our basket this week.
Ingredients & Directions:
www.ecologicalbabies.com
ecologicalbabies@gmail.com
574.275.1235
Added later- These pickles turned out delicious and had the perfect crunch. Once we started eating them, they didn't last long!
Just like all the new things I've tried at home for the first time this year (making detergent, etc), this is another EASY thing to do from home and much healthier for you. The recipe I am sharing came from a local CSA member who has been using this recipe to make pickles. I was excited that she passed this along because we received a ton of pickling cucumbers in our basket this week.
Ingredients & Directions:
1/8 cup fresh dill
8 garlic cloves, whole or sliced
1/2 cup white wine vinegar
1/2 cup apple cider vinegar
2 cups water
1/4 cup salt (necessary to preserve)
1/2 tsp. ground black pepper
1/2 Tbs. turmeric (optional for color)
3 cucumbers, sliced into 1/3-inch rounds (add last)
8 garlic cloves, whole or sliced
1/2 cup white wine vinegar
1/2 cup apple cider vinegar
2 cups water
1/4 cup salt (necessary to preserve)
1/2 tsp. ground black pepper
1/2 Tbs. turmeric (optional for color)
3 cucumbers, sliced into 1/3-inch rounds (add last)
Stir all ingredients except the cucumber together in a large bowl. Add
the cucumber slices and place something heavy (like a plate) on top in the
bowl so that the cucumbers stay submerged under the surface of the liquid.
Cover the bowl with a cloth to keep out bugs. Let the cucumbers marinate
at room temperature for 3 days. Refrigerate when ready.
the cucumber slices and place something heavy (like a plate) on top in the
bowl so that the cucumbers stay submerged under the surface of the liquid.
Cover the bowl with a cloth to keep out bugs. Let the cucumbers marinate
at room temperature for 3 days. Refrigerate when ready.
Enjoy!
Peace,
Jen Starks, Owner
www.ecologicalbabies.com
ecologicalbabies@gmail.com
574.275.1235
Labels:
Cooking,
DIY,
Food,
Green Living,
Saving Money,
Simplicity
Wednesday, July 18, 2012
Dirtiest/Cleanest Produce-Summer
Usually every year, an updated list is released for the "Dirty Dozen/Clean 15" for fruits and vegetables. Unfortunately, they don't list it by season, so there are a lot of ones to remember. And to be honest with you, I still get some confused trying to remember it.
Today, I decided to put together a good list for veggies and fruit that would be specifically for summer. Of course, I'd advocate trying to purchass as much organic as possible. But shopping this way can ease the pressure on your wallet until you can afford to buy all organic.
Dirtiest:
Sweet bell peppers
Peaches
Grapes
Spinach
Lettuce
Cucumbers
Blueberries
Potatoes
Kale/Collards
Cherries
Raspberries
Summer Squash
Cleanest:
Onions
Sweet Corn
Pineapple
Cabbage
Eggplant
Watermelon
Mushrooms
I was surprised to find that tomatoes were in the middle of the list. I would have expected them to be higher under the dirty list.
Note: This came from a list at: http://www.ewg.org/foodnews/list/
Any surprises for you?
To good health,
Jen
Jen Starks, Owner
www.ecologicalbabies.com
ecologicalbabies@gmail.com
574.275.1235
Labels:
Announcement,
Cooking,
Food,
Gardening,
Green Living,
Saving Money
Thursday, April 19, 2012
DIY: Make Your Own Baby Food
How to Make Your Own Baby Food
By: Angela Meredith
Today, a wide range of baby food products from basic jarred Gerber
to organic pouches in unique flavor combinations are available at your local
market. No matter how creative the packaging or interesting the flavor combinations,
commercially prepared baby food cannot overcome this one important fact: homemade baby food is better for baby than commercially prepared products.
Homemade baby food:
·
Taste better and is more nutritious than
commercial products because it’s made with fresh, unprocessed ingredients.
·
Is less expensive than commercial products.
Compare the price of produce and commercial baby food by ounce and you’ll find
that making your own baby food is 3–4 times less expensive than buying
prepared items.
·
Is environmentally friendly because there is no
packaging to dispose of. And if you use locally grown organic produce, you further
reduce your carbon footprint.
·
Is more aligned with the foods and flavors that
are eaten in your home.
·
Can be made to suit your baby’s taste and
texture preferences.
| Use organic produce from your local co-op, growers market, or farm. |
Perhaps you don’t need convincing when it comes to the why of making your own baby food, and
you’re more interested in the what, when,
and how of the process. Here’s a
condensed guide:
When is baby ready?
Every baby and family is different, so naturally readiness
for solids will vary greatly. It’s commonly recommended to start solids at 6
months. However, some babies are ready as early as 4 months and others not
until after their first birthdays. Ultimately, it’s up to baby, and he will let
you know with one or more of these common signs:
- Baby can hold her head up and sit up well on her own.
- Baby shows interest in what you’re eating by watching you eat, responding to the sights and smells of the kitchen, or by fussing at mealtime as though he’s hungry.
- Baby will accept being fed solids either using mom or dad’s finger, a spoon, or by self-feeding.
Solids and
breastfeeding
![]() |
| The national breastfeeding symbol. |
Sometimes moms are concerned that beginning solids will
precipitate weaning, and so delay feeding baby his or her first food. Truth is,
most babies will continue to breast feed in addition to eating solids for as
long as needed or allowed. Even after solids, breast milk or formula is the
most complete nutrition for your baby and should be continued throughout the first
year or, for breast milk, even longer.
Food safety
Food allergies, botulism, and food sensitivities are some
concerns when introducing solids. The most common food allergies are: milk,
egg, wheat, nuts, shellfish, fish, and soy. Use the following “new food process”
to easily identify the cause of a reaction should there be one: feed baby only one
new food at a time, and feed it to her for 2–3 days without introducing another
new food. Also, avoid honey during baby’s first year, as it carries a risk of botulism.
First foods
| Carrots are rich in vitamin A, taste sweet, and are filling for little tummies. |
Many pediatricians and parent resources suggest that boxed
rice cereal is the best first food. It’s a low-allergen food and processed for easy
digestion. The flip side is that because rice cereal is so heavily processed it
does not resemble actual rice. Organic and fortified brands are available,
which may be the best choice if you want to include rice cereal in your baby’s
diet.
Though rice cereal is not bad for baby, there are more nutritious
and much tastier options:
- Sweet potato
- Apple
- Pear
- Squash
- Carrots
- Avocado
- Banana
Tools of the trade
Once baby is ready and you’ve decided on the first food,
it’s time to assemble your tool kit, which can be done with items you already
have in your kitchen:
·
For preparing fresh produce you’ll need a sharp knife,
cutting board, and a vegetable peeler.
·
For cooking the peeled and chopped produce
you’ll need a few pots and pans.
·
For turning the cooked fruits and veggies into
baby food you’ll need a small food processor or blender and a strainer.
·
For storing your now cooked baby food, you’ll
need a set of ice cube trays (or Little Bites Freezer Trays) for freezing, and
some gallon-size freezer bags in which to store the frozen cubes.
·
For storing fresh food directly in the fridge,
you’ll need an assortment of small snack-size containers.
| I prefer a small food processor because it works well with small to medium portions and takes up less space. |
How to cook it
You have four options when it comes to preparing baby food: steam,
stew, broil, or bake. I choose my cooking method depending on how much time is
available, what the weather is like, and what else I’m cooking. Stovetop
preparations take less time than in the oven and don’t heat up the house, which
is critical during the hot summer months here in Florida. During the winter, I enjoy
a nice cozy kitchen and often use the oven to cook other meals, so it’s easy to
pop in an extra dish.
Some nutrients are lost during the cooking process and can
be recaptured by adding the cooking water back into your puree. Once you’ve cooked
the fruit or veggie until it is soft and easily pierced with a fork, puree with
your food processor; add liquid as necessary and, if needed, strain to achieve the
best consistency for your baby.
![]() |
| This combination of hand-held strainer, large measuring cup, and small bowl works great. I use the small bowl to push the blended food down through the strainer. |
How to store and
serve
Serve baby food fresh or freeze it using the ice cube tray
method to create a stash of quick healthy meals. Refrigerated food is good for
up to three days, while frozen food is good for up to three months. When it’s
time to feed baby, heat the baby food until steaming and then cool to room
temperature before serving. Do not reuse partially eaten portions in which you’ve
introduced a utensil that’s been in baby’s mouth. When we put a spoon into
baby’s mouth and then back into the food we transfer bacteria from one to the
other. To avoid wasting portions, spoon a small amount of food from the storage
container into a dish and feed baby from the dish.
| Small bowls made of durable plastic or glass are perfect for feeding baby. |
How to make the time?
Making your own baby food can seem like a daunting,
time-consuming chore, but the truth is it’s as simple as steaming a pot of
veggies. It’s easy to cook foods for everyday meals that can be adapted for
baby. This cuts down on additional cooking and meets the ultimate goal of
feeding baby what you’re eating as much as possible. When you have time,
prepare batches of your baby’s favorites to freeze and store for quick and
healthy meals.
Another way to work it into a busy schedule is to take batch-making
one-step at a time: wash and chop in the morning after breakfast, cook at lunch
and then puree and store at dinner. Also, “mashable” foods like bananas and
avocados are good to keep around for quick, no-cook meals.
Commercially
prepared baby food is meant to be a convenience item, so use it as such when
traveling or out and about, and then re-used the jars for storing homemade
foods in the refrigerator.
Certain moments with my children, like watching them sleep
peacefully or eat a healthy home cooked meal, bring me serenity. I breathe
easier during these moments, and am grateful. When I prepared and fed them
their first baby foods, I felt that it was in investment in their health, and
one of the best gifts I could give. I wish the same for you and yours.
Sincerely,
Angela
850-345-8242
Bio:
Angela Meredith is a writer, editor, mother, and wife living
and working in Tallahassee, Florida. You can read more of her writing here.
www.ecologicalbabies.com
Labels:
DIY,
Green Living,
Saving Money,
Simplicity
Thursday, March 29, 2012
What's in Your Deep Freezer?
These past few months, I have been trying to keep my food bills under bay. I've been working on ways to save while also eating healthy and in season. It has been a great challenge. However, the last week of a month is always the most challenging. This week, I am not going into the grocery store. Rather I'm working with what I already have. Thank goodness for my deep freezer!
Last night, I was rummaging through the cupboard and the nursery rhyme about Old Mother Hubbard came to mind. It was kinda funny! Fortunately, I still have a few summer, fall, and winter goodies in our deep freezer and we ended up with a pretty decent meal!
For dinner, we had a mystery soup (unlabeled) from a soup swap I participated in, final round of our asparagus, sauteed spinach, and some frozen delicious peaches with whipped cream. The peaches came from our deep freezer and is always a treat to bring out from late summer. We have a few left
to tide us over until they are in season again.
So if you are on a food budget, what do you do at the end of the month when it's gone? Do you have any go-to meals you seem to make at that time?
Our seasonal produce from last summer and fall is starting to dwindle. Here's what's left:
On the left are some frozen meals and some frozen chicken stock. The next tray is our fruit basket and pumpkin and peaches are the only seasonal produce in there. Our meat selection is stocked better, since we don't consume a lot of meat. There is more meat underneath these baskets along with frozen bread I buy in bulk. Then our lonely green pepper bag is in our veggie tray-alas! I'm very much looking forward to some spring veggies to stock.
What's still left in your deep freezer?
Peace,
Jen Starks, Owner
www.ecologicalbabies.com
ecologicalbabies@gmail.com
574.275.1235
Last night, I was rummaging through the cupboard and the nursery rhyme about Old Mother Hubbard came to mind. It was kinda funny! Fortunately, I still have a few summer, fall, and winter goodies in our deep freezer and we ended up with a pretty decent meal!
For dinner, we had a mystery soup (unlabeled) from a soup swap I participated in, final round of our asparagus, sauteed spinach, and some frozen delicious peaches with whipped cream. The peaches came from our deep freezer and is always a treat to bring out from late summer. We have a few left
to tide us over until they are in season again.
So if you are on a food budget, what do you do at the end of the month when it's gone? Do you have any go-to meals you seem to make at that time?
Our seasonal produce from last summer and fall is starting to dwindle. Here's what's left:
On the left are some frozen meals and some frozen chicken stock. The next tray is our fruit basket and pumpkin and peaches are the only seasonal produce in there. Our meat selection is stocked better, since we don't consume a lot of meat. There is more meat underneath these baskets along with frozen bread I buy in bulk. Then our lonely green pepper bag is in our veggie tray-alas! I'm very much looking forward to some spring veggies to stock.
What's still left in your deep freezer?
Peace,
Jen Starks, Owner
www.ecologicalbabies.com
ecologicalbabies@gmail.com
574.275.1235
Labels:
Green Living,
Saving Money,
Simplicity
Sunday, March 25, 2012
Stain busting laundry detergent
There are TONS of recipes out there for homemade laundry detergent, and after trying a good number of them, I have finally found my favorite. I've been using this concoction for several months, and am so happy with it that I'm pretty sure this will be my new standard from now on.
I have a busy little boy who loves to play hard and get messy. Dirt, food, paint, markers, popsicles, blood, you name it - it's been on his clothes. My husband is a middle school drama teacher, and has been known to come home from work with paint on his clothes, too. Building sets and making props is dirty work!
So I need a laundry detergent that works HARD. Because the last thing I want to deal with is pre-treating or re-washing. I want a detergent that gets out the stain the FIRST time.
Enter the humble Fels Naptha soap. Fels Naphtha was developed in 1893 as a home remedy for treating skin troubles caused by poison oak, poison ivy, and other oil-transmitted organic skin-irritants. Savvy homemakers quickly realized that not only would it wash away itch-causing oils from the skin, but it was also extremely effective at washing clothes. Folks have been grating Fels Naptha soap into their laundry water ever since. It's stain-busting power is unmatched in my opinion. Plus, it's only 97 cents a bar. You can't beat that!
Ready to wash some dirty clothes? Here we go! This is what you'll need:
Round up some super washing soda, borax, and fels naptha soap. These items should be right there with your regular laundry detergents at the store. You'll also need a grater and a container to keep your detergent in. A big glass mason jar works well, as does an old yogurt container, which seem to multiply like bunnies around here.
Step one - grate your soap. You need half the bar. Looks kind of like cheddar cheese, doesn't it? I think a finer grate works better, but if you're using a microplane grater get ready for a major tricep workout. The soap bars are pretty dense. Usually I get my handy husband to grate the soap for me, but I needed detergent in a bad way so I used my plain old box grater and did it myself. The detergent works fine, but I prefer a finer grate because the final product mixes together a little better that way.
Grate the soap and put it in your storage container. Then measure out one cup of borax, and one cup of super washing soda. Add to the container, put the lid on tight, and shake shake shake!
Ta da! Here's the finished product. I use an old 1/8 C measuring cup, and a scoop with that per large load gets the job done to my satisfaction. A couple tablespoons would probably work, too, if you don't have an 1/8 measure laying around. (PS - if you have a bigger container, by all means make a bigger amount.)
Here is the basic recipe in copy/paste-able form:
Stain Busting Laundry Detergent
1/2 bar of Fels Naptha soap, grated
1 C borax
1 C super washing soda
I honestly cannot vouch for the safety or efficacy of using this on cloth diapers. I have looked all over the internet and as with most things, opinions abound. Some say it is not cloth diaper safe, others say they use it all the time. Some say it's great for busting the stinkies, others say it makes it worse. I LOVE it for our clothes, but can't say from personal experience how it would work on diapers.
If you are looking for a cloth diaper safe homemade detergent, it's an easy substitution - switch out a bar of Dr. Bronners bar soap for the Fels Naptha. Perfectly safe, and widely used.
Since we are long past diaper washing days, I'd love some anecdotal evidence. Do you use homemade detergent? What recipe do you use? Do you use it on clothes AND on diapers?
Claire Williamson
Ecological Babies
(850) 228-8322
Thursday, March 22, 2012
Thirsties-Why they are the Best Investment
If you have been using cloth diapers or reading about them, you have probably noticed that one-size diapers are all the rage. In theory, it makes sense. Who wants to keep spending money again and again for cloth diapers (although it can become a little addicting sometimes!)?
Only a couple years ago, it was normal to buy 4 sizes from XS to L for your baby. Some of you who've been with Ecological Babies that long remember our Thirsties Covers. Well, the market changed to figure out how to make a diaper that grows with the baby (often in the form of a couple rows of snaps in the front).
Then the one-size diaper was born. Let's be real though. Not all babies fit the typical 8-35 lbs birth to potty training that most one-size diapers are designed. And those that are on either end of the spectrum aren't going to find a great fit (too small or too large).
Thirsties took this trend to the next level and created a 2-sized diaper. (One size goes from 6-18lbs and the other goes from 18-40lbs.) In my opinion, 2 sizes is a much better investment.
Top Reasons Why 2 Sizes Are Superior:
- Less Wear & Tear on your Diapers- Size 1 will last about a year and will stay in great condition if you have future children or want to sell them used. A one-size diaper can be rough if used from 8-35lbs. It typically is worn over 300 times if in regular rotation!
- Two Sizes give a better weight range- Starts at 6lbs and ends at 40lbs. This way, your baby can truly use them right from birth and all the way to potty training. Who wants to have to buy more diapers when your toddler is 2 but not ready to potty train?
- Two Sizes give a much better fit- Have you seen a newborn in a one-size diaper? Big diaper & small baby!
Why Thirsties is Superior:
-All of their products are made in the USA.
-Most of the diapers are sewn by women in their homes!
-If there is a defect (rare as it is, it does happen from time to time), they have superior customer service.
-They are one of the greenest companies in the world (e.g. 100% powered by wind).
-Their diapers/covers have my favorite features:
-leg gussets in their covers and duo diapers- great for preventing leaks, creates a great fit for
skinny or chunky babies, and keeps the diaper in place when baby is on the move
- Their inner fleece is super soft on their duo diapers
- The inserts swish out in the laundry on their duo diapers, which keeps you from pulling it out
yourself
-The duo diaper inserts are the best- They have 2 different types snapped together (microfiber &
hemp/cotton
blend). This allows extra absorbency, less bulk, quick drying, and stay cleaner after washing.
-Finally, I love how it gives you the option of either hook/loop (velcro) or snaps. That's another
blog post in itself but great for meeting the needs of all families.
-Pocket Style diapers are convenient, great for night or day, dry quicker, AND can last longer than
all-in-one styles. The pocket part can easily line-dry which is less wear and tear on the diaper.
If you'd like to learn more about Thirsties' sustainable choices or about their mission, check it out. It's very impressive!
Peace,
Jen Starks, Owner
www.ecologicalbabies.com
ecologicalbabies@gmail.com
574.275.1235
Only a couple years ago, it was normal to buy 4 sizes from XS to L for your baby. Some of you who've been with Ecological Babies that long remember our Thirsties Covers. Well, the market changed to figure out how to make a diaper that grows with the baby (often in the form of a couple rows of snaps in the front).
Then the one-size diaper was born. Let's be real though. Not all babies fit the typical 8-35 lbs birth to potty training that most one-size diapers are designed. And those that are on either end of the spectrum aren't going to find a great fit (too small or too large).
Thirsties took this trend to the next level and created a 2-sized diaper. (One size goes from 6-18lbs and the other goes from 18-40lbs.) In my opinion, 2 sizes is a much better investment.
Top Reasons Why 2 Sizes Are Superior:
- Less Wear & Tear on your Diapers- Size 1 will last about a year and will stay in great condition if you have future children or want to sell them used. A one-size diaper can be rough if used from 8-35lbs. It typically is worn over 300 times if in regular rotation!
- Two Sizes give a better weight range- Starts at 6lbs and ends at 40lbs. This way, your baby can truly use them right from birth and all the way to potty training. Who wants to have to buy more diapers when your toddler is 2 but not ready to potty train?
- Two Sizes give a much better fit- Have you seen a newborn in a one-size diaper? Big diaper & small baby!
Why Thirsties is Superior:
-All of their products are made in the USA.
-Most of the diapers are sewn by women in their homes!
-If there is a defect (rare as it is, it does happen from time to time), they have superior customer service.
-They are one of the greenest companies in the world (e.g. 100% powered by wind).
-Their diapers/covers have my favorite features:
-leg gussets in their covers and duo diapers- great for preventing leaks, creates a great fit for
skinny or chunky babies, and keeps the diaper in place when baby is on the move
- Their inner fleece is super soft on their duo diapers
- The inserts swish out in the laundry on their duo diapers, which keeps you from pulling it out
yourself
-The duo diaper inserts are the best- They have 2 different types snapped together (microfiber &
hemp/cotton
blend). This allows extra absorbency, less bulk, quick drying, and stay cleaner after washing.
-Finally, I love how it gives you the option of either hook/loop (velcro) or snaps. That's another
blog post in itself but great for meeting the needs of all families.
-Pocket Style diapers are convenient, great for night or day, dry quicker, AND can last longer than
all-in-one styles. The pocket part can easily line-dry which is less wear and tear on the diaper.
If you'd like to learn more about Thirsties' sustainable choices or about their mission, check it out. It's very impressive!
Peace,
Jen Starks, Owner
www.ecologicalbabies.com
ecologicalbabies@gmail.com
574.275.1235
Sunday, March 18, 2012
DIY- Mold Remover
If you are anything like me, you haven't been keeping up with those sinks and bathtub rims. In damp locations, mold quickly builds up (especially if you live in a humid location!).
I love cleaning solutions that all you have to do is spray and then easily wipe up later for great results. This is one of those recipes. Unlike some recipes that have to be made right before use, this mold remover solution can keep in a spray bottle to have on hand. Heck, you could spray your bathroom after a shower and then wipe it up next time you use the restroom.
The Players:
1/2 Cup hydrogen peroxide
1 Cup water
Few drops of tea tree oil (optional)
Someday soon, I am going to write about all the great uses of hydrogen peroxide but I love that I can find a large bottle in just about at any grocery store, dollar store, pharmacy store, and it is very inexpensive.
Mix all your ingredients into your spray bottle. Spray a generous amount on your moldy area. Wait at least an hour and then scrub off. I like to use an old tooth brush for this, especially for those hard to reach areas. Just make sure you make an obvious indication that this toothbrush is used just for cleaning. :)
Happy cleaning!
Peace,
Jen Starks, Owner
www.ecologicalbabies.com
ecologicalbabies@gmail.com
574.275.1235
I love cleaning solutions that all you have to do is spray and then easily wipe up later for great results. This is one of those recipes. Unlike some recipes that have to be made right before use, this mold remover solution can keep in a spray bottle to have on hand. Heck, you could spray your bathroom after a shower and then wipe it up next time you use the restroom.
The Players:
1/2 Cup hydrogen peroxide
1 Cup water
Few drops of tea tree oil (optional)
Someday soon, I am going to write about all the great uses of hydrogen peroxide but I love that I can find a large bottle in just about at any grocery store, dollar store, pharmacy store, and it is very inexpensive.
![]() |
| Before! |
Mix all your ingredients into your spray bottle. Spray a generous amount on your moldy area. Wait at least an hour and then scrub off. I like to use an old tooth brush for this, especially for those hard to reach areas. Just make sure you make an obvious indication that this toothbrush is used just for cleaning. :)
![]() |
| AFTER! |
Happy cleaning!
Peace,
Jen Starks, Owner
www.ecologicalbabies.com
ecologicalbabies@gmail.com
574.275.1235
Labels:
DIY,
Green Living,
Saving Money,
Simplicity
Friday, March 16, 2012
The Wearin' o' the Green

We are celebrating St. Patrick's Day with a green inspired giveaway. All you have to do to enter is share in the comments below a way that you and your family save some green, and make the earth a little more green at the same time. You can get a bonus entry by posting a picture of your child (in a cloth diaper, of course!) enjoying the outdoors on our Facebook page. Let's all celebrate making the earth a little greener!
The winner will be announced on Saturday by noon, and will receive a Thirsties Duo Diaper in meadow in the size of your choice. Size 1 fits babies 6-18 pounds, size 2 fits babies 18-36 pounds.
Features:
• Two-piece diapering system with an absorbent insert & a waterproof sleeve diaper
• An adjustable rise for extended use to suit your growing baby
• Two sizes will fit from birth-to-potty
• Leg gussets provide superior protection against leaks
• Pliable and breathable in 8 fun colors!
• Sleeve design for easy stuffing & easy cleaning
• Microfiber terry & hemp combo insert for optimal absorption-7 layers in all!

If the winner is local to Tallahassee, you can come pick it up at the REUSE Festival at Railroad Square Saturday from 1-6. There will be recycled art vendors, gardening and composting demonstrations, information booths about sustainable living, arts, crafts, and games for kids, and even a farmers market! Also lots of good food and live music. We hope you'll come see us if you can!
Happy St. Patrick's Day from Jen and Claire at Ecological Babies
Thursday, January 19, 2012
The best calzone filling EVER!!!
Before we get started, let me apologize for the weird spacing and formatting. I promise one day I'll get the hang of blogging!I've had leftover chicken in my fridge for longer than I care to admit. It's from a chicken I boiled for stock, which means it needs to be in a casserole or something because there's not much flavor in boiled chicken. I was thinking I would make a pot pie with it, but I just haven't been inspired to make one.
One of the meals I was planning to make this week was ham, cheddar, and broccoli calzones. But the ham I got from the deli counter this morning was just too darn tasty and was just begging to be made into sandwiches.
Also lurking in the fridge was this odd, Amish-style Swiss cheese that I bought because it looked interesting, and I'd never heard of Amish-style Swiss cheese before. It's delicious, but for some reason we hadn't used much of it. I got my cheese from Publix a couple weeks ago and threw away the wrapper, and I grated it before thinking to take a pic, but the gorgeous cheese in the photo can be found here.
I made dough this afternoon from the recipe in an earlier post, and was planning to make extra steamed broccoli with dinner to go in the calzone filling. I wasn't making the calzones for a particular meal, just to have on hand in the freezer for my husband's lunch, quick dinners, or snacks.
All of a sudden it hit me - Chicken, Swiss, and broccoli calzones!!! As my pal Ina Garten would say, "How bad could that be?" Grant was happy on the porch playing with his tools at his tool bench making a "new invention," so I figured I'd go all out and make an actual cheese sauce instead of just using shredded cheese.
If I do say so myself, they are AMAZING!!! In fact, I don't even have a picture to show you because we ate all 12 of them after Grant went to bed. No, just kidding. Actually I just forgot to take a picture because I was too busy and excited making them. I know, I'm a food dork.
I kind of threw this together, but I will attempt to recreate the recipe because seriously, these were delicious and totally worth the extra steps of making a cheese sauce.
Chicken, Swiss, and Broccoli filling for calzones
For the cheese sauce:
3 Tablespoons butter
3 Tablespoons flour
salt and pepper
1 C chicken stock (or broth)
1/2 C milk
1 C shredded Swiss cheese
1 C finely chopped steamed broccoli
1 C shredded chicken
Melt the butter on low heat, stir in flour, salt and pepper. Whisk for a few minutes to cook the flour. Whisk in milk and stock, and turn up the heat. Bring it almost to a boil, and keep whisking until it's nice and thick. Remove from heat and stir in the cheese. Stir in broccoli and chicken, and assemble your calzones as directed here.
A note - For this recipe, only divide the dough into 8 pieces. You need thick dough rounds since the filling is a little runnier than the other ones I wrote about. If the dough is too thin the calzones could burst in the oven (and if they do it's not a big deal, just push the filling back in).
Eat all twelve at once, or eat a few, let the rest cool, then wrap individually in foil, label, and freeze.
Enjoy!
Please note, credit for the photo above comes from http://www.cubacheese.com/.
Claire Williamson, Representative for Ecological Babies
(850) 228-8322
Sunday, January 8, 2012
Calzones with Homemade Dough
How many times has dinner snuck up on you, and you end up standing in front of your fridge at 5pm thinking, "well great – what are we going to eat for dinner?" Don’t feel bad. It happens to everybody, even cook-aholics like me. Inspite of careful meal planning and grocery shopping, there are still those nights when you just don’t feel like cooking, but a bowl of cereal or scrambled eggs just won’t cut it.
So what’s the solution? Keep a stash of highly-processed, MSG-laden bagged meals in the freezer? You know, the ones with the sauce pellets that you nuke, stir, nuke some more? The ones that go on sale buy one get one every other week? Yikes!
There’s a better way to beat the 5pm dinner woes than a bag of mystery stir fry. I like to call it Investment Cooking. You put in a little extra time on the weekends or on a weekday when you’ve got some extra time, and you cook extra meals, double recipes, or just cook large quantities of a protein (roast beef, chicken, etc) to save for using on a later date. One of the best Investment Recipes that isn’t a recipe at all is a roasted chicken, or a boiled chicken. From a single chicken, you can end up with 8 cups of delicious homemade stock and at least 2 cups of meat. You can boil it to use the meat in casserole type dishes like enchiladas or pot pies (then you already have your stock made), or you can roast it and eat it alongside rice and a side salad, then boil the carcass (isn’t that an awful word?) for stock. The humble chicken is a power house in Investment Cooking.
Today’s topic, however, is one that’s a little more fun to think about than boiling a dead bird. Homemade hot pockets! Or if you want to be fancy, we can call them calzones. Whatever you title it, this recipe is my family’s all-time favorite food to have on hand in the freezer for work lunches, Sunday nights, or random Tuesdays when I just don’t feel like cooking. And let’s just say it – hand-held food is fun! And if one of your diners is a child, then hand-held is pretty much a guaranteed hit, at least at my house. It’s easy to double or even triple, and you can fill them any number of ways.
On a side note, any other children of the 80s out there? Is it just me, or can you still sing the Hot Pockets jingle? What about Bagel Bites? My mom never would buy this stuff for my sister and I – she insisted on homemade food, which I recall as a child thinking that was very uncool. Surely all the cool kids got food that magically cooked in the microwave. I also distinctly remember asking for those nifty Kid Cuisine TV dinners each time we went to the store and always hearing a resounding NO. We got the occasional grape soda in the summer, but that’s about as wild as things got. Man, I didn’t know how good I had it. Thank you, Mama, for laying the foundation of good homemade food (even though for a long time I thought you were just being mean not buying me nasty fake rainbow colored food).
Sorry, I get sidetracked easily. Back to homemade hot pockets! I mean, calzones. Dinner pockets? Whatever.
Let’s make some dough! This is a very versatile dough, and one you will do well to learn and have in your repertoire. You can make it ahead of time and stick it in the fridge, or double/triple the recipe: some to use now, some for later. You can make pockets, regular pizza crust, mini pizzas, plain little dough rounds (great with butter and jam for breakfast), or even pitas. If you’ve
never made bread before and phrases like “proof the yeast” freak you out, this is a perfect beginner recipe. Try it! I promise you can do it!
Our humble cast of characters: Flour, oil, salt, yeast, sugar (not pictured) and water (in the sink).
For the record, yes, I know many people think canola oil is evil. It was on sale, and works well in baking. Please don’t let this change your opinion of me. Feel free to substitute olive oil.
I’m not really a recipe follower (except for cookies and candy, which are sciences and not to be trifled with), so bear with me. Measure 1 ½ cups of warm water (tap is fine) into a glass measuring cup. How warm? Like a baby’s bath water. Lots of dough recipes call for taking
temperatures. If you are particular about these things, feel free to google yeast temperature charts and bust out your thermometer. But here’s a good rule of thumb: if it feels like it would be cold on your baby’s bottom, your yeast won’t like it either. If it would burn your baby’s bottom, you would kill your yeast. Simple, right?
Into your 1 ½ cups of baby bath temperature water, add 1 packet of yeast, or 2 ¼ teaspoons (this you do need to measure accurately) of bulk yeast. Sprinkle in some sugar (about a teaspoon), or a squirt of honey to feed your yeast. Set this aside for 10 minutes or so while you get out your mixer, bowl, dough hook, etc. This is called proofing. Your yeast will eat the sugar, and create lots of lovely foam on top of your warm, toasty water.
Ta da! Happy, well-fed yeast:

temperatures. If you are particular about these things, feel free to google yeast temperature charts and bust out your thermometer. But here’s a good rule of thumb: if it feels like it would be cold on your baby’s bottom, your yeast won’t like it either. If it would burn your baby’s bottom, you would kill your yeast. Simple, right?
Into your 1 ½ cups of baby bath temperature water, add 1 packet of yeast, or 2 ¼ teaspoons (this you do need to measure accurately) of bulk yeast. Sprinkle in some sugar (about a teaspoon), or a squirt of honey to feed your yeast. Set this aside for 10 minutes or so while you get out your mixer, bowl, dough hook, etc. This is called proofing. Your yeast will eat the sugar, and create lots of lovely foam on top of your warm, toasty water.
Ta da! Happy, well-fed yeast:
Now for the mixing. What?! No stand mixer? Never fear, a wooden spoon and your hands will do just fine. (But seriously, though, make a mental note to ask Santa for one next Christmas.)
Measure 3 cups of flour into your bowl. We’ll start with that, then add more as necessary. Use your favorite flour, so long as it is all purpose, not self-rising. Please don’t use bleached flour. Bleach doesn’t belong in food. Or diapers, either, but I guess that’s for another post.
Add 1 teaspoon of salt, and turn your mixer on low to start stirring. Use the dough hook. If you don’t have a mixer, just stir. Slowly pour in the yeast/sugar (or honey)/water mixture. Add 3 tablespoons of oil. Keep stirring or keep the mixer running on low until it’s all incorporated. Stop and scrape your bowl, then turn the mixer back on. It should look about like this, kind of ropey and gooey.
Slowly add in ½-1 more cup of flour, and continue kneading with the dough hook until the dough comes away from the sides of the bowl, like this:
If you are doing this by hand, you’ll probably have to knead in this last cup of flour, since by now the dough is slightly stiff and stirring would either be too hard or not effective.
At this point, cover your bowl (or put your dough back in the bowl) with a towel and set aside for a couple hours to rise. Or put it in the fridge and think about it tomorrow, Scarlet O'Hara-style. After a couple hours, it should look like this, and will smell amazing! Really! I love making dough and watching it change texture like magic. So does my 3 year old, which makes my heart happy.
At this point, you can turn your dough out onto a floured counter or board and have your way with it. Roll it out for one big pizza, pull off little bits and roll for mini pizza or pockets.
Or, once you roll out the little pieces of dough, let them rest and rise for another 30 minutes, then bake at a high temperature and you have pita pockets! Or if you’re 3, you can eat it as is. Raw. Yum?!
By the way, I highly encourage you to allow your children to help you in the kitchen. With practice, they can probably do much more than you might think! Here are Grant and I, working together to knead the dough after turning it out. I think it is so very important to teach children where real food comes from. Make bread together, so they know it’s not all pre-sliced from the grocery store. Put cream in a jar and shake it so they see what butter really is. Pick blueberries in the summer and make jam together. I even let my son help me stir things on the stove and slice vegetables (with a Pampered Chef spreader with a blunt serrated edge). Children learn by trying, and the more you let them try (and inevitably fail and make a huge mess) the more they
learn. And if they’re anything like my Grant, anything they make themselves they will be much more inclined to actually eat.
But back to the recipe…at this point, we pulled off bits of dough and rolled them into small circles. Don’t roll it too thin, or your calzones (or are we calling them pockets now?) might burst and ooze filling onto your baking sheet and it’s hard to scrape off. (Don’t ask me how I know this.)
I’m pretending you can’t see thesink full of dirty dishes. I cook a lot, ok? Let’s focus instead on the ¼ cup of flour my son is wearing and the fact that my fabulous husband is helping roll
out the dough. Dinner is a family affair around here. See? Here he is with Grant making the filling:
One of our favorite fillings is spinach ricotta, and we dip the finished calzones in marinara sauce. Here’s a basic recipe:
1 small container ricotta cheese
1 egg
½ package frozen spinach, thawed
and thoroughly wrung out
¼ cup parmesan cheese
½ C mozzarella cheese
Basil, oregano, onion powder,
garlic powder, salt and pepper to taste
Ta da! Thank you, sweetie!
Put a little blob (that’s a technical term) on each circle (use your imagination) of dough.
Fold over, and seal with your fingers or a fork.
Bake at 400 for about 15 minutes until golden brown.
I really wish this picture wasn’t blurry. Oh well. See the one in the middle that’s deformed? And the one on the left that’s oozing filling? That’s what happens when you let a 3 year old make your dinner. You know what, though? He ate it! So there!
Make a big batch of these with your family next weekend. Let the ones you don’t eat right away cool completely, then wrap them up in foil and toss them in the freezer. One night down the
road when your baby has a leaky diaper, your 3 year old has a tantrum at preschool, and your husband has to work late, you’ll be so glad you’ve got these yummy things tucked into the freezer! Just thaw them out, and warm in the oven. Ta da! Instant dinner, no microwave required.
Here is our other favorite filling – cheeseburger!
Brown a pound of ground beef with some diced onion and garlic. Drain, then stir in about ¼ cup of ketchup, a few tablespoons of mustard, and a few spoonfuls of dill or sweet relish. Put a slice of cheddar cheese on each rolled out dough round, then put a heaping spoonful of the meat mixture on top of the cheese. Seal and bake at 400 for 10-15 minutes.
Seriously, these are so good. It feels naughty, like fast food, or college-style from-the-freezer food. But guess what - you made it yourself! Hooray! Eat some more!
Happy Cooking, you guys! More recipes to come.
Claire Williamson
850.228.8322
Subscribe to:
Posts (Atom)


